
In this post, I’m going to walk you through how to transform a boring steel door into a gorgeous DIY faux wood door. It’s a fairly simple project, but it does require some patience. I promise you though, it will be worth it.
We recently had to purchase a front door for our home. The decision of which door to get was easy for me – I knew exactly what I wanted. I had watched endless Fixer Upper episodes and scoured Pinterest. I had a nice little folder with multiple pictures of beautiful, richly stained, wooden front doors. Unfortunately, when it came time to actually purchase our door, the decision all of a sudden wasn’t so simple. I had NO IDEA how expensive wooden exterior doors were. Needless to say, we didn’t have $1,500 to drop on a front door. It definitely wasn’t something that was going to be able to fit into our budget. That’s when my husband suggested a much more affordable option: the steel door.
Now, I didn’t want a painted door, so I started googling ways how to make a steel door look like wood, and guess what – you can actually stain a door to look like wood. A DIY faux wood door! After consulting multiple websites, I finally settled on this video. I’d have to buy stain and some wood graining tools, spend a little time getting the design I wanted, and then coat it with a protective coat of polyurethane. It seemed simple enough to me!
I highly recommend watching the video above before you attempt this. You will need to set aside six days days, as each coat requires 24 hours to dry completely. Please note: YOU MUST USE ZAR STAIN. This project will not work with minwax, varathane, or any other stain brand. ZAR has something in it that really allows it to penetrate deep and essentially tattoo itself onto the steel door. I have read other posts where the person used a different brand and the next day the wood grain design wiped right off. So, do yourself a favor and buy ZAR right off the bat for your faux wood door.
This DIY faux wood door project may look daunting, but I promise you, you can do this. It’s honestly a lot easier than you’d think! The below items are all linked to websites where you can purchase them from. Let’s get started, shall we?
Items needed:
- Wood graining tools
- ZAR Wood Stain
- 2″ Flat chip brush
- Lint free staining rags
- Foam Brush
- ZAR Polyurethane
- Latex gloves
Step 1:
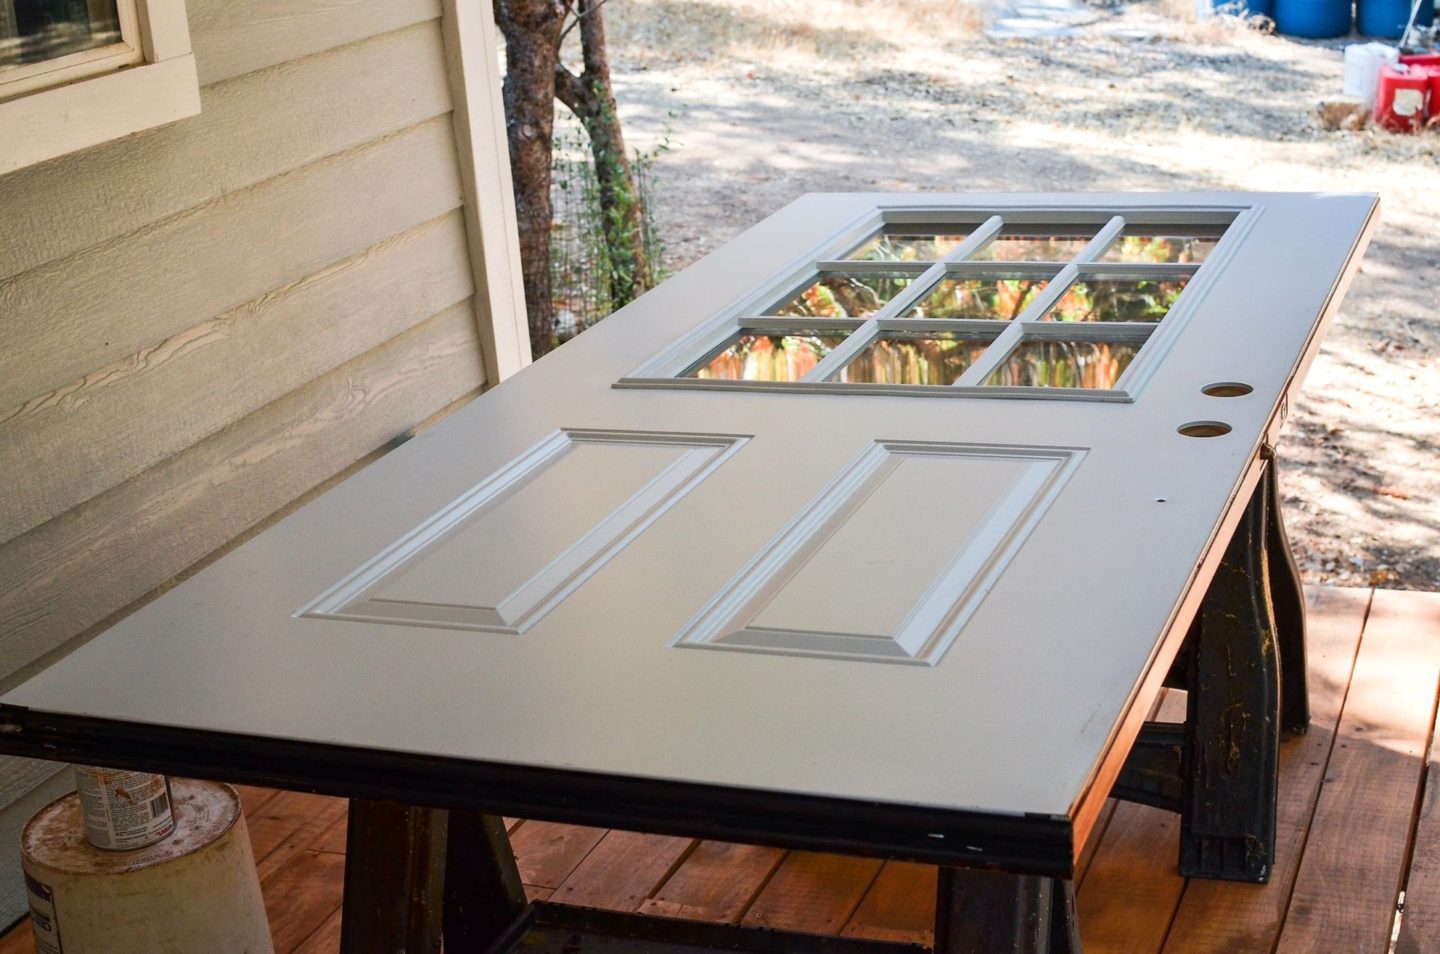
Frist, clean your door. Break out the dawn dish soap and water hose because you do not want any oil or dirt on your door – think of it as a blank canvas. Then dry it off with a lint free towel or air dry. Next, lay out your door on some saw horses so that you don’t have to bend down so far. If you’re like me and are a stickler for detail, you will be taking your time and all the bending over will make your back rather sore. Let’s make this as easy for you and your back as possible by bringing the door closer to you.
Step 2:
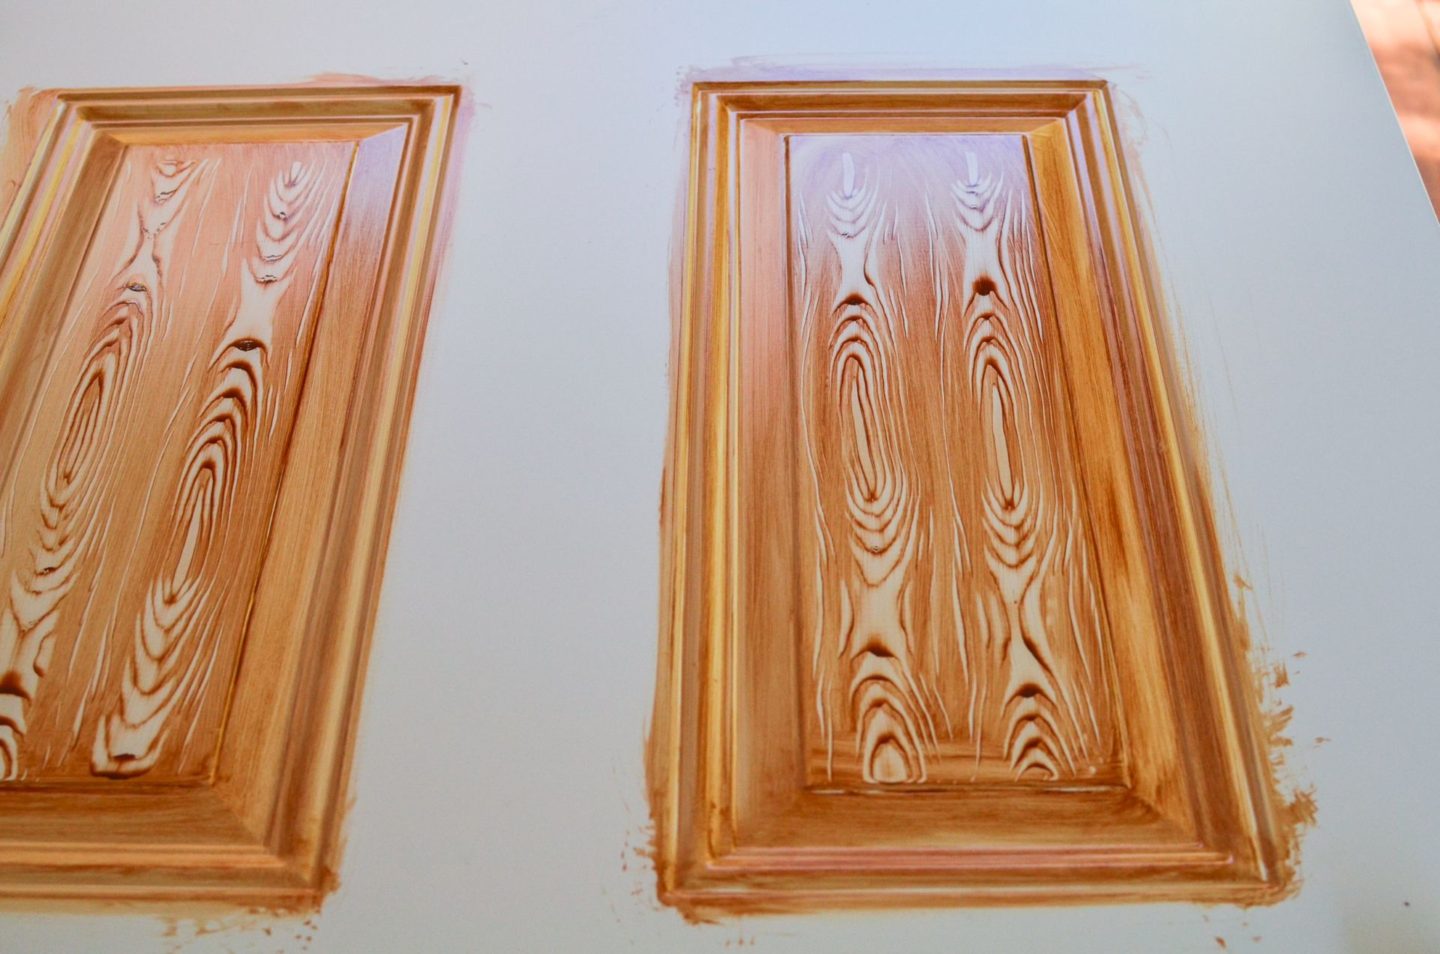
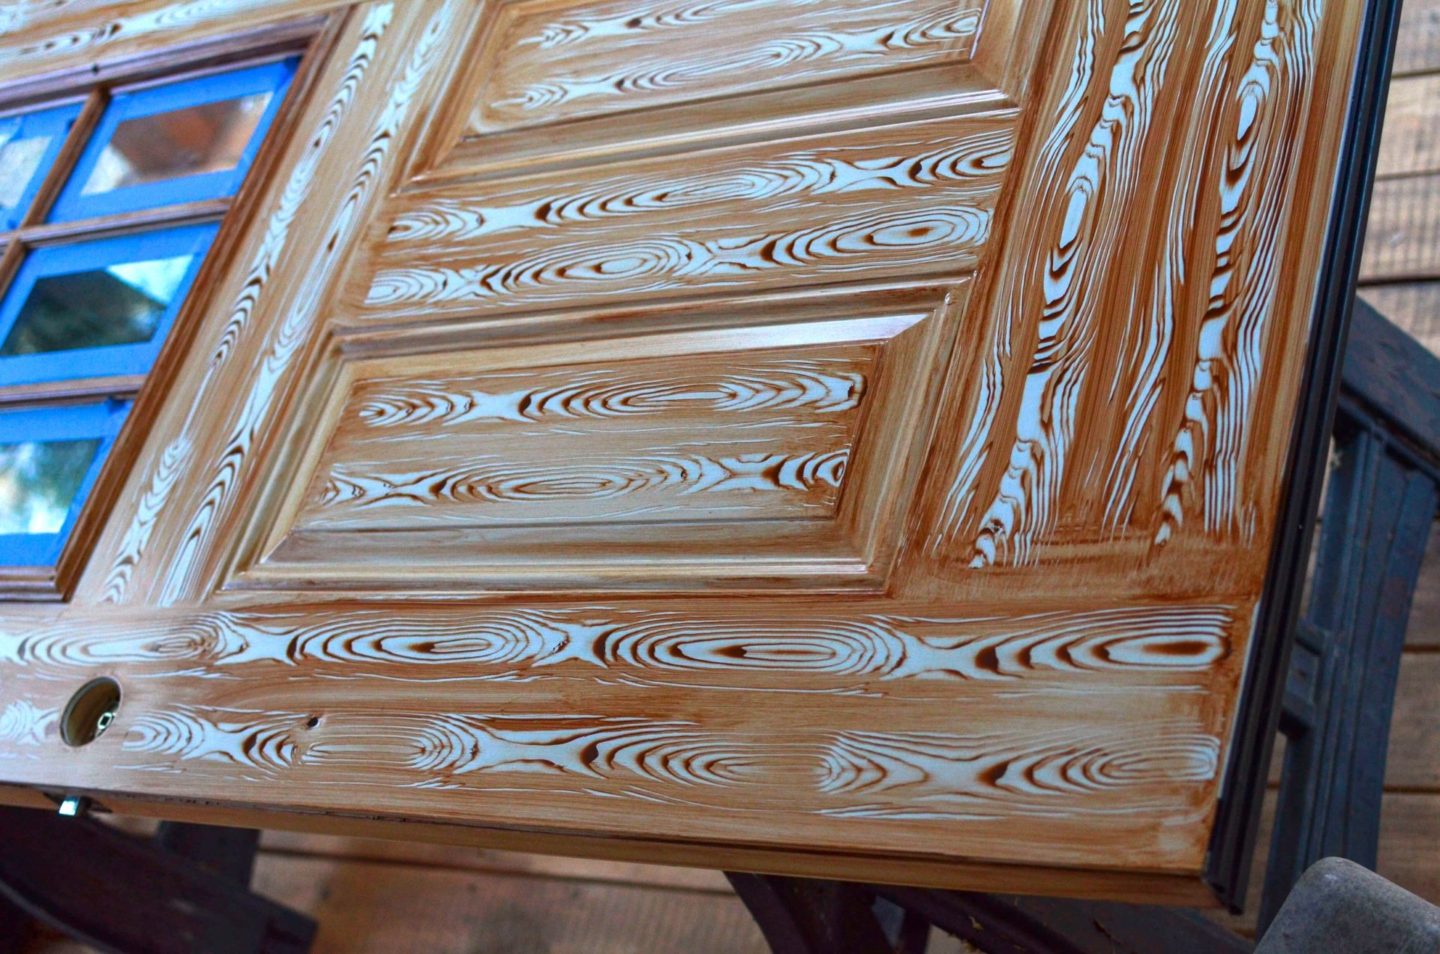
Take your lint free staining rag and dip it gently into your stain. Keep in mind and maybe consult some pictures of wood doors to note which way the wood grain flows. Start with one section at a time; I started with the inner panel as the video directed. I wiped on a thin coat of stain, then drug the wood graining tool in a slowly rocking motion down the panel. It takes a couple passes to get the hang of it, but the beauty is that is you end up with a section you don’t like, simple “erase it” by wiping the stain rag over it and starting again. This project is pretty forgiving. Keep working in sections, panel by panel, working from the center out. The long edge pieces should be the last ones you do.
Step 3:
Check out your work and dab up any puddles, feathering them outward with your bristle chip brush. The feathering will make it fade into the wood grain appearance. It’s starting to look great, isn’t it? After you touch up the door, phase one is complete. You will need to let this dry for 24 hours.
Step 4:
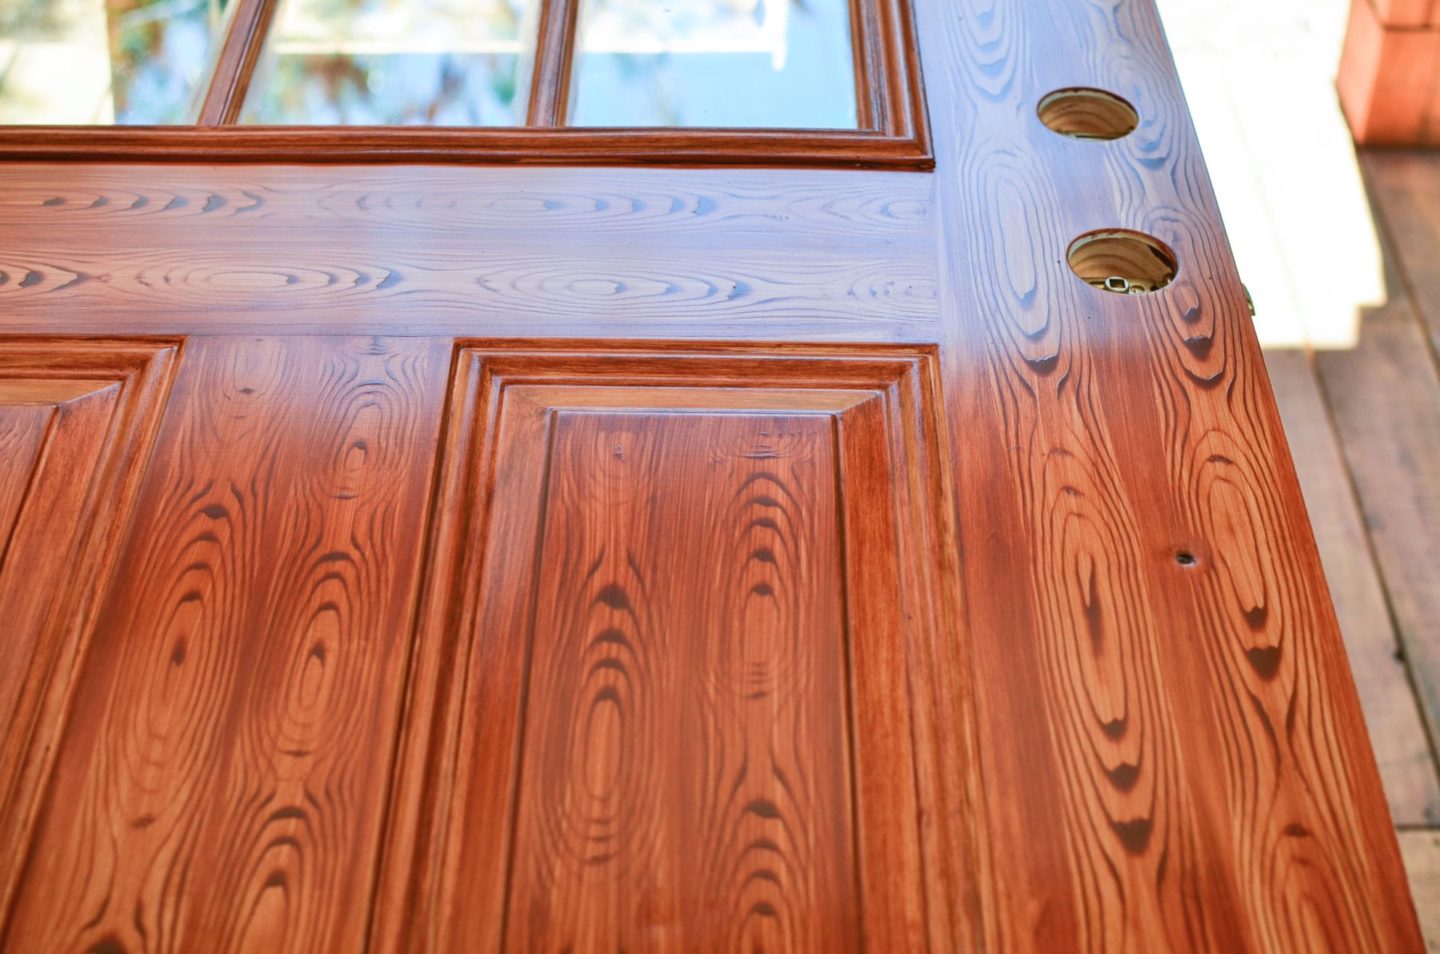
Today, we get to apply the tone coat, which is when you will really get to see this door come to life. Take a clean stain rag and dip it into your stain. Rub it over the stained wood grain and make sure to get into every corner. A thinner coat will allow the wood grain to show through more and a thicker coat with blend it in a bit more. I ended up doing a thicker coat, which ended up looking a bit more realistic to me. As with before, make sure you go over it after with your dry chip brush and smooth out any puddles that may have formed in the corners. Once you finish and have achieved the look you want, the second phase is done and you will leave your door to dry for another 24 hours.
Step 5:
This step is the easiest. At this point, it’s a new day and you will be applying the protective coat. Using your foam brush and ZAR polyurethane (I used the water based poly as oppose to oil so that it would go on clear and not have a yellow tinge), apply two to three coats, allowing it to dry about 30 minutes between each coat.
Great news, this side is done! Admire your beautiful door and then flip it over the next day and repeat Steps 1-5 on the other side. This is one of the DIY projects that I am most proud of and everything time someone comes by and comments on our gorgeous door I get the satisfaction of telling them it’s actually a steel door that has been stained and wood grained. This DIY faux wood door project is budget friendly and much cheaper than purchasing an actual wooden door.
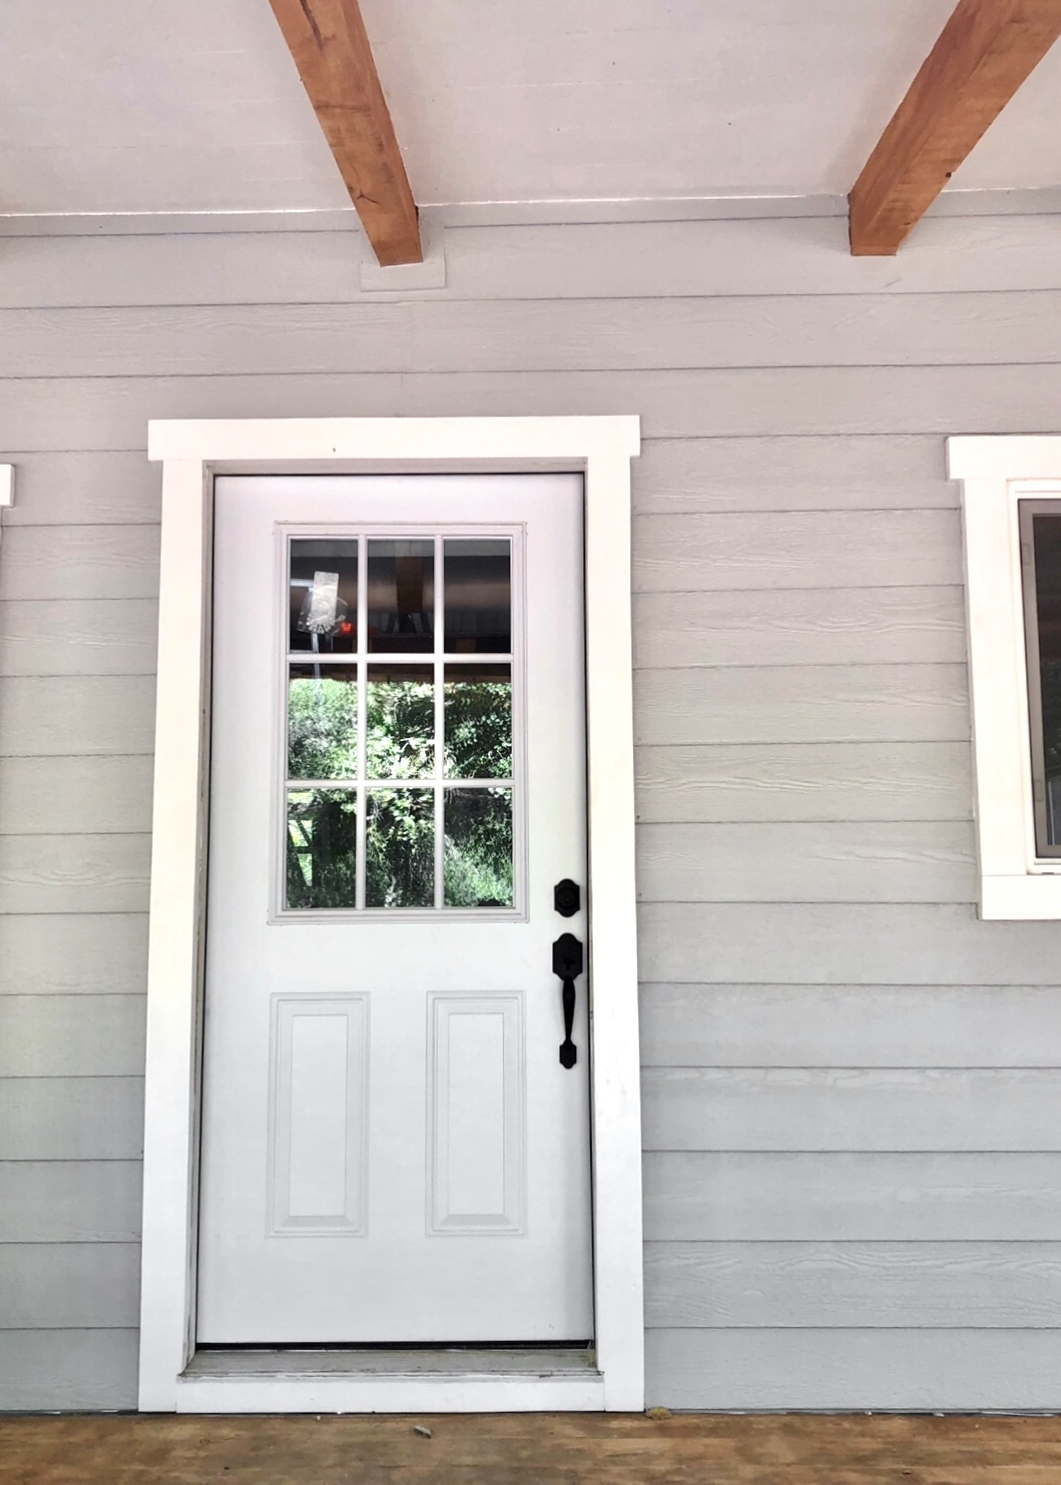
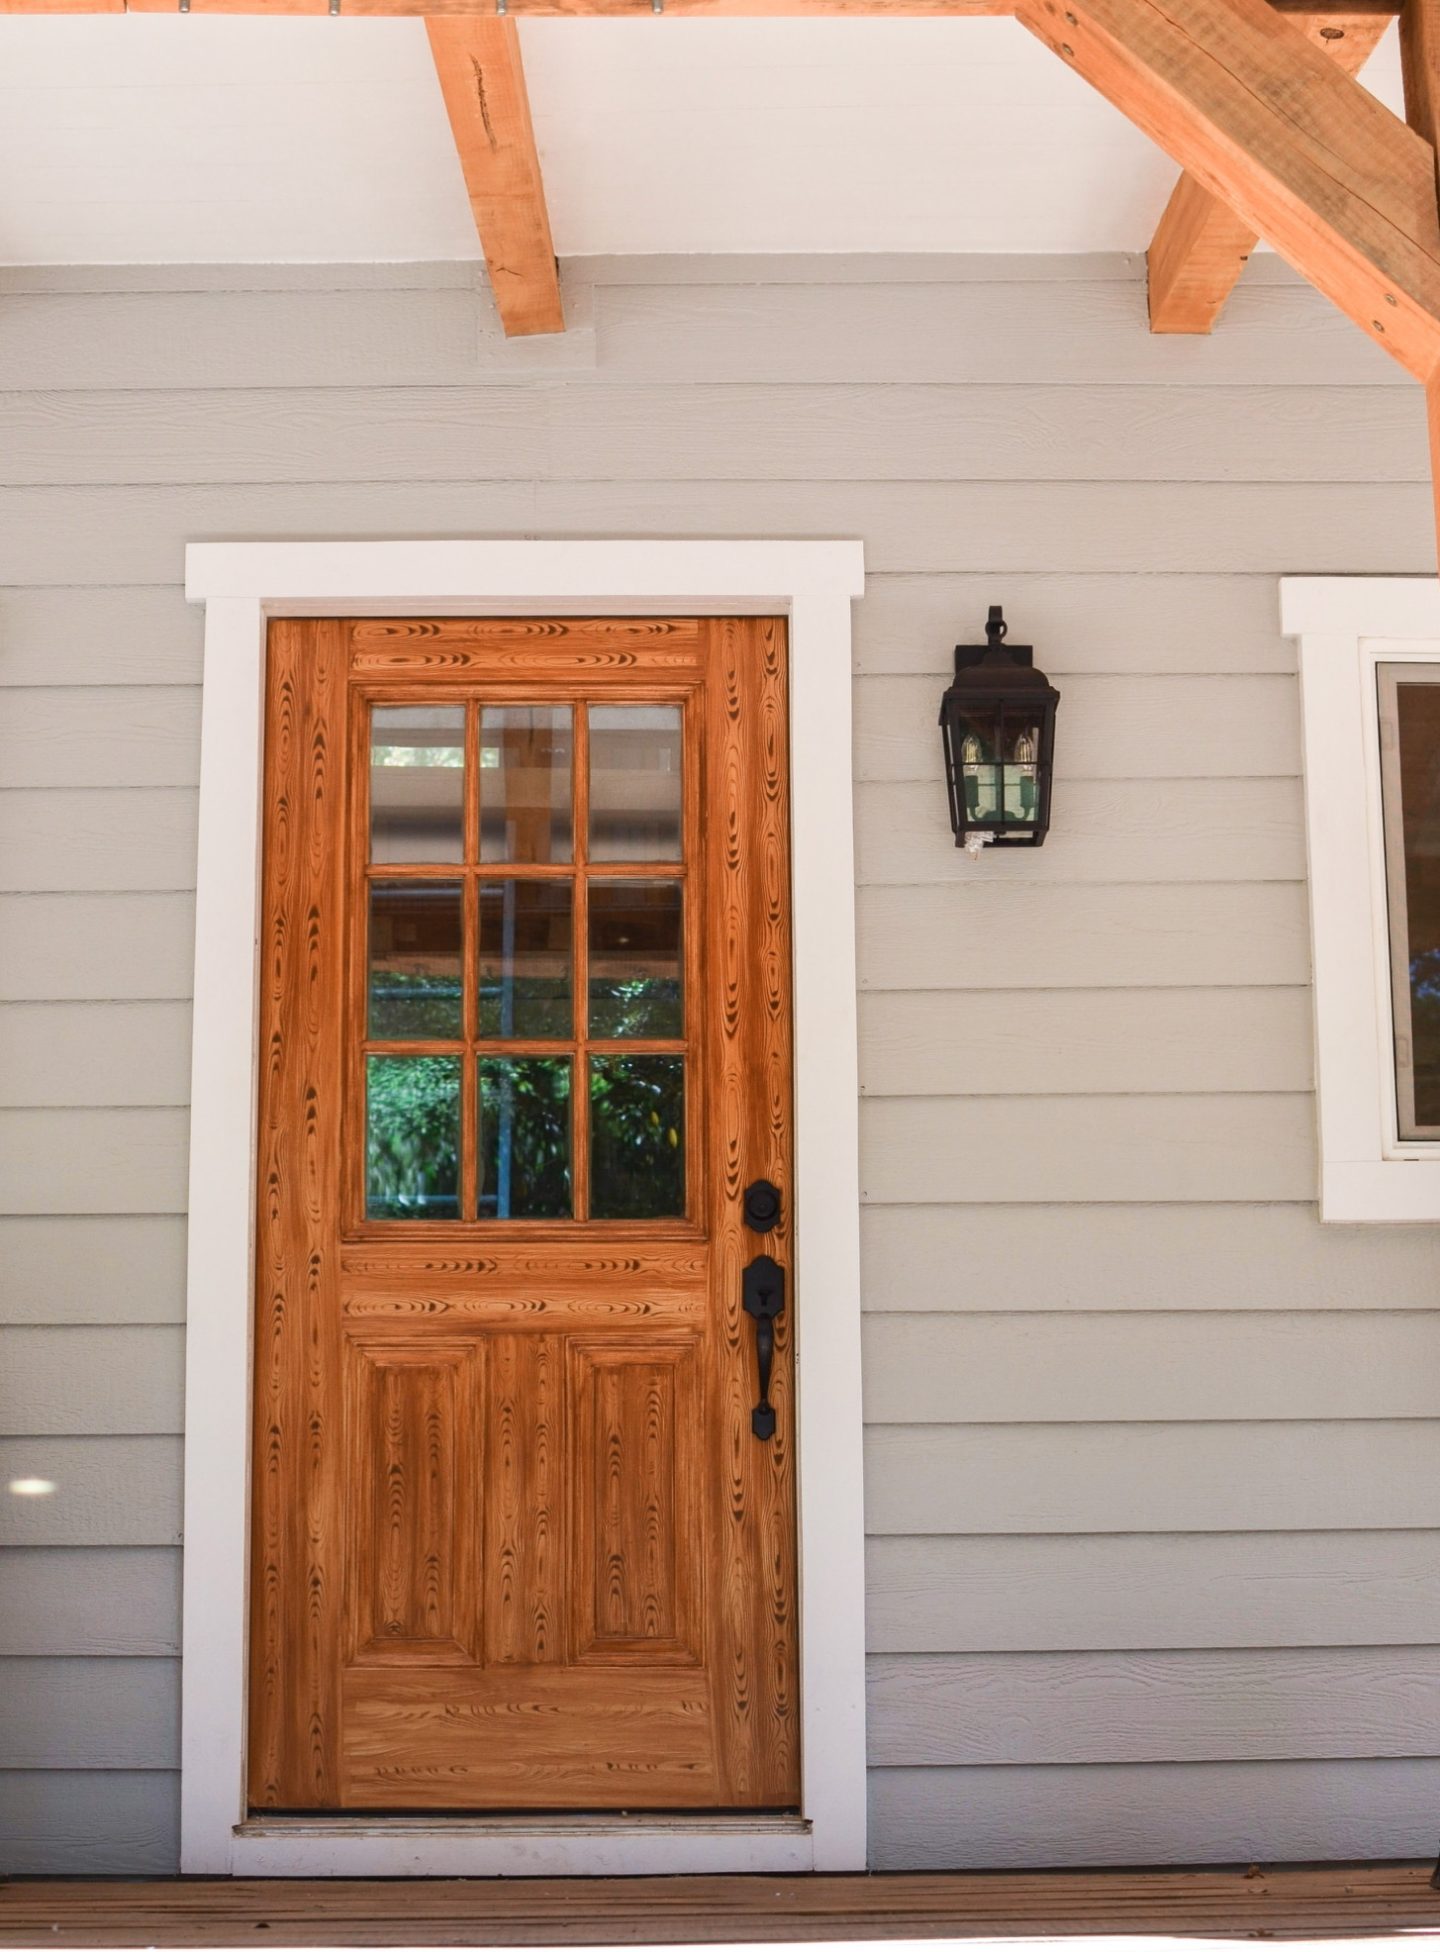
Above: Steel door before and after
If you decide to take on this project, let me know and I will happily answer any questions you have! It’s easier when you have someone else cheering you on.